You have just got a new Turing Pi cluster board. Plugged the compute modules. So what do you do next?
You would need to follow these steps to install the necessary software:
- Choose the needed operating system image.
- Download the image.
- Switch the first compute module to Flash Mode (This would only be required if using eMMC compute modules. For Lite modules, you can skip steps 3-5 and flash the microSD cards).
- Flash the compute module via USB.
- Switch the compute module to Boot Mode.
- Turn on the module and check that the image is installed correctly.
- Repeat steps from 3 to 6 for each of the remaining modules (if you are using Jetson Modules, you would have to choose a different operating system.
- Find, install, and set up the right flavor of Kubernetes.
It’s a big task. Moreover, if you want to test various software configurations to find the most suitable for your specific needs, ensure that reconfigurations and bug fighting could require additional time.
Solution
To help you avoid setting up the cluster manually, we are developing a firmware for the Turing Pi 2 that allows you to install the software (ranging from an operating system to Kubernetes) with only a couple of commands.
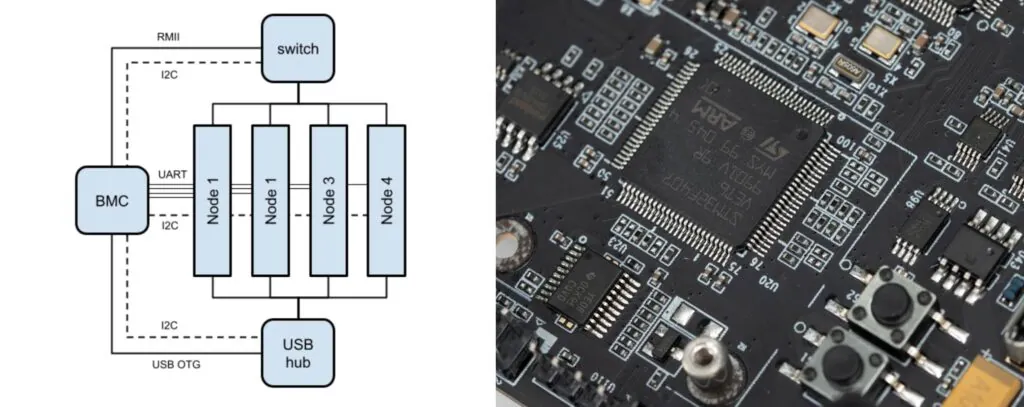
To establish a comprehensive connection between the firmware and the compute modules, we pushed the idea of the Cluster Management Bus further and added a Baseboard Management Controller (BMC).
The BMC connects to the nodes via the following protocols: Ethernet (RMII), UART, USB, and I2C. Each protocol is used for a separate function (i.e., USB for flashing the eMMC compute modules, UART for serial console).
This design offers complete control over each node and even additional clusters by remote access. This is especially beneficial if you manage a fleet of clusters distributed across different locations.
The Firmware
The new firmware offers a set of compute module remote management functions (e.g., serial console over LAN, remote OS image flashing, authentication, self-testing, Over-The-Air management). It allows you to bootstrap a cluster from bare metal hardware to an all-set-up kubeconfig, resume workflows after failures, and increase your management capability.
The functions that the firmware is already providing:
- The API getaway: a server that allows flashing compute modules over HTTP or HTTPS.
- Auth: a username and password authentication system.
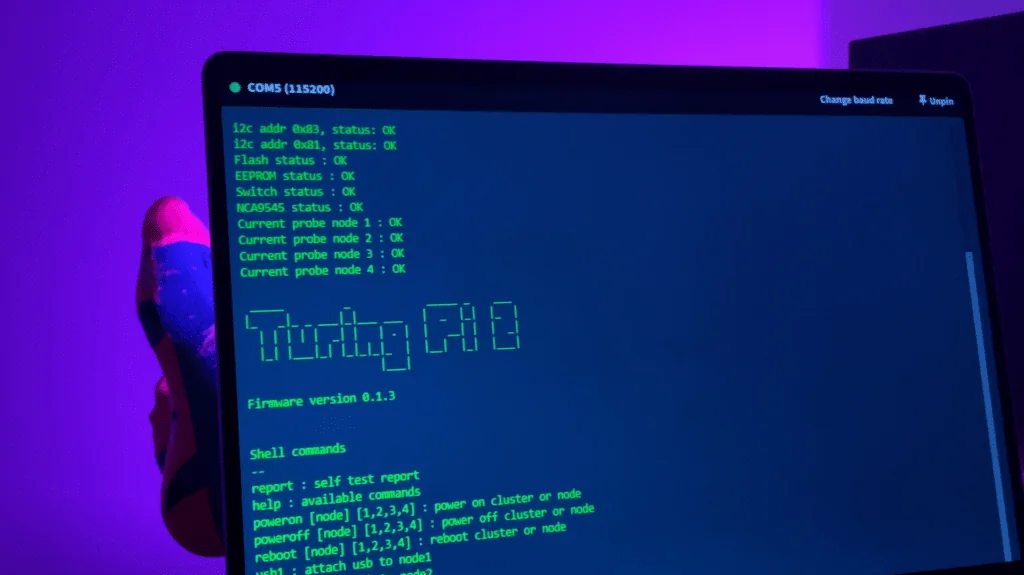
- Self-test: a self-diagnostics system for problem identification. It is launched automatically during the start-up of the mainboard (Power On Self Test) and displays the test results in the serial console. You can initiate the self-diagnostics process manually with the self-test command.
- Over the air updates (OTA): a system that updates the BMC’s firmware. It receives the most recent firmware version and loads it into the BMC.
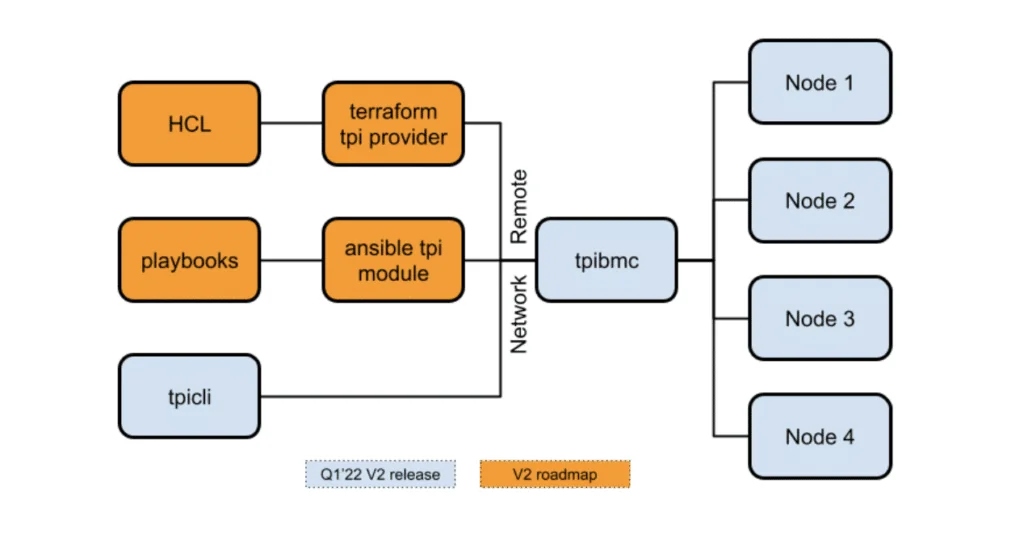
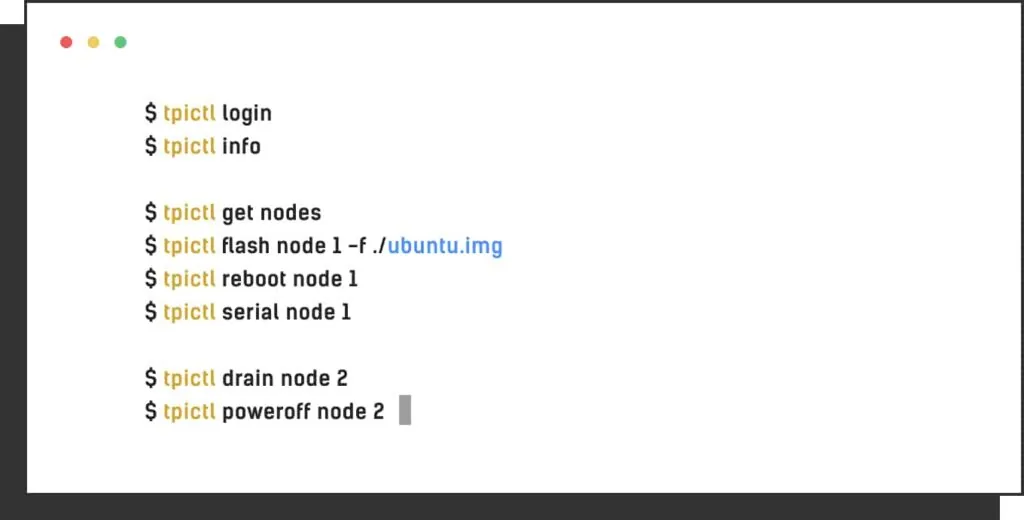
- tpicli: a command-line interface to interact with the cluster from a developer’s laptop. It features the complete functionality of the API gateway and looks up cluster members in a network.
Development Roadmap
All cluster carrier boards will have the latest firmware pre-installed.
We will present the API gateway documentation and share the code of the tpicli. This will allow creating providers for Terraform and Ansible, which we have in our development roadmap.