Self-hosted personal cloud platforms let you store, sync, and access your files from anywhere without paying monthly subscription fees or relying on third-party infrastructure. Services like Google Drive, Dropbox, iCloud, and OneDrive are convenient, but they come with storage limits, recurring costs, and limited control over where your data lives.
If you’re already running a Turing Pi 2.5 with an RK1 node and an NVMe drive, you have everything needed to build your own personal cloud. In this guide, we’ll create two complementary services: Samba for high-speed LAN file sharing and Nextcloud for browser access, mobile apps, desktop synchronization, file sharing, calendars, contacts, and the cloud-style experience most people associate with Google Drive or Dropbox.
Unlike the Kubernetes-focused articles earlier in this series, everything here runs on a single 32GB RK1 node using Docker Compose. MariaDB, Redis, and Nextcloud all live on NVMe-backed storage, providing the performance needed for daily use while keeping deployment and maintenance straightforward.
What This Guide Covers
This guide walks through building a complete self-hosted personal cloud on a single RK1 node using Docker Compose. It covers NVMe preparation and persistent mounting, Samba for high-speed local file sharing, a full Nextcloud stack with MariaDB and Redis, performance tuning for daily use, and optional Syncthing-based replication for maintaining a second copy of your data.
It is intended for Turing Pi users with a working RK1 node and an installed NVMe SSD who want a reliable, self-hosted storage platform for file synchronization, network file sharing, backups, and day-to-day personal cloud services.
Prerequisites
Before starting, make sure the following requirements are met:
- Turing Pi 2.5 with RK1 module running Ubuntu 22.04 ARM64 (8GB, 16GB, or 32GB)
- NVMe SSD installed and detected by the operating system (
/dev/nvme0n1in this guide) - Docker Engine and Docker Compose installed and working
- SSH access to the RK1 node with sudo privileges
- A static IP address or DHCP reservation recommended for reliable Samba and Nextcloud access
- Basic node setup completed (networking, updates, SSH access, and Docker installation)
If you’re starting with a fresh RK1 module, complete the Turing Pi 2.5 + RK1 Complete Setup Guide before proceeding. This guide assumes Ubuntu is installed, SSH access is working, Docker is available, and the NVMe drive is detected by the operating system.
Note: Some systems use the newer Docker Compose plugin (docker compose), while others use the legacy standalone binary (docker-compose). Use whichever command is available on your system throughout this guide.
Part 1: Prepare the NVMe for Storage
Verify Detection
Confirm the NVMe drive is visible to the operating system:
lsblk
Expected output (abridged):
NAME         MAJ:MIN RM SIZE RO TYPE MOUNTPOINT
nvme0n1      259:0   0  465.8G  0    disk
If the drive does not appear, power down the system, reseat the NVMe drive, and verify that the RK1 module can detect the NVMe device correctly.
Partition and Format
Warning: The steps below will erase all existing data on the selected NVMe drive. Confirm you are working with the correct device before continuing.
Create a single primary partition covering the full drive:
sudo fdisk /dev/nvme0n1
Inside fdisk, press:
n
p
1
Then press Enter to accept the default first and last sectors.
If fdisk detects an existing filesystem signature, it may ask:
Do you want to remove the signature? [Y]es/[N]o:
Type:
Y
to remove the old signature and continue.
Finally, press:
w
to write the partition table and exit.
Format as ext4:
sudo mkfs.ext4 /dev/nvme0n1p1
When formatting completes, the filesystem UUID will be displayed. You can copy it now or retrieve it later with blkid
Mount and Persist
Create the mount point:
sudo mkdir -p /mnt/nvme
Retrieve the filesystem UUID:
sudo blkid /dev/nvme0n1p1
Example output:
/dev/nvme0n1p1: UUID="12345678-90ab-cdef-1234-567890abcdef" TYPE="ext4"
Add the filesystem to /etc/fstab using the UUID rather than the device path. UUIDs remain consistent across reboots, while device names can change if storage hardware is added, removed, or enumerated differently during boot.
sudo nano /etc/fstab
Add an entry using the UUID returned by blkid:
UUID=<uuid> /mnt/nvme ext4 defaults,noatime 0 2
For example, if blkid reports:
/dev/nvme0n1p1: UUID="12345678-90ab-cdef-1234-567890abcdef" TYPE="ext4"
then use:
UUID=12345678-90ab-cdef-1234-567890abcdef /mnt/nvme ext4 defaults,noatime 0 2
The noatime option prevents Linux from updating file access timestamps on every read operation, reducing unnecessary write activity on the SSD.
Mount the filesystem without rebooting:
sudo mount -a
Verify the mount succeeded:
mount | grep /mnt/nvme
Expected output:
/dev/nvme0n1p1 on /mnt/nvme type ext4 (...)
Create Directory Structure
Create dedicated directories for Samba, Nextcloud, and the database:
sudo mkdir -p \
  /mnt/nvme/samba \
  /mnt/nvme/nextcloud \
  /mnt/nvme/nextcloud-db
Set ownership on the Samba share directory so authenticated users can create, modify, and delete files through SMB:
sudo chown -R <uid>:<gid> /mnt/nvme/samba
Replace <uid> and <gid> with the values returned by:
id
For example:
uid=1000(ubuntu) gid=1001(ubuntu)
would become:
sudo chown -R 1000:1001 /mnt/nvme/samba
Verify the mount:
df -h /mnt/nvme
Expected:
Filesystem      Size  Used Avail Use% Mounted on
/dev/nvme0n1p1  458G  28K  435G   1% /mnt/nvme
Part 2: Samba for LAN File Sharing
Samba turns the NVMe share into a network drive accessible from Linux, Windows, macOS, and other SMB-compatible clients on your local network. In this section, we’ll deploy Samba in Docker and expose a directory on the NVMe SSD as a shared network drive.
Create a working directory:
mkdir -p ~/docker/samba && cd ~/docker/samba
Check your user and group IDs:
id
Example output:
uid=1000(ubuntu) gid=1000(ubuntu) groups=1000(ubuntu)
Make a note of your UID and GID values. You’ll use them in the Docker Compose file below.
Create docker-compose.yml:
services:
  samba:
    image: dperson/samba:latest
    container_name: samba
    restart: unless-stopped
    ports:
      - "137:137/udp"
      - "138:138/udp"
      - "139:139/tcp"
      - "445:445/tcp"
    volumes:
      - /mnt/nvme/samba:/mnt/data
    environment:
      - TZ=<your-timezone>

      # Replace with the UID and GID from the `id` command
      - USERID=<your-uid>
      - GROUPID=<your-gid>

      # Share name, path inside container, browseable, read-only, guest-ok
      - SHARE=files;/mnt/data;yes;no;no

      # Replace with your own username and password
      - USER=<samba-username>;<strong-password>

      - WORKGROUP=WORKGROUP
      - NMBD=true
    tmpfs:
      - /tmp
Before deploying, replace:
<your-uid>and<your-gid>with the values returned byid<your-timezone>with your local timezone<samba-username>and<strong-password>with credentials you want to use for SMB access
Start the container:
docker-compose up -d
Verify that the container is running:
docker ps
Expected output (abridged):
CONTAINER ID   IMAGE                  STATUS
xxxxxxxxxxxx   dperson/samba:latest   Up (healthy)
Test the Share
Determine your node’s LAN IP address:
hostname -I
Example output:
192.168.0.103 172.17.0.1 172.18.0.1
Use the first address on your local network (for example, 192.168.0.103) when connecting to Samba or Nextcloud. Ignore Docker bridge addresses such as 172.x.x.x.
Linux
Install Samba client tools if necessary:
sudo apt install -y smbclient
Connect to the share:
smbclient //<rk1-ip>/files -U <username>
Enter the password you configured in the Compose file.
Expected output:
Try "help" to get a list of possible commands.
smb: \>
Run:
ls
to verify access, then:
quit
to disconnect.
Windows
- Open File Explorer.
- Right-click This PC → Map network drive.
- Enter:
\\<rk1-ip>\files
- Check Connect using different credentials.
- Enter the username and password configured in the Compose file.
The share should now appear as a network drive in File Explorer.
macOS
- Open Finder.
- Select Go → Connect to Server.
- Enter:
smb://<rk1-ip>/files
- Click Connect.
- Enter the username and password configured in the Compose file.
The shared folder should mount and appear in Finder like any other network volume.
At this point, files stored in /mnt/nvme/samba are accessible from any authorized device on your local network.
Part 3: Nextcloud Personal Cloud
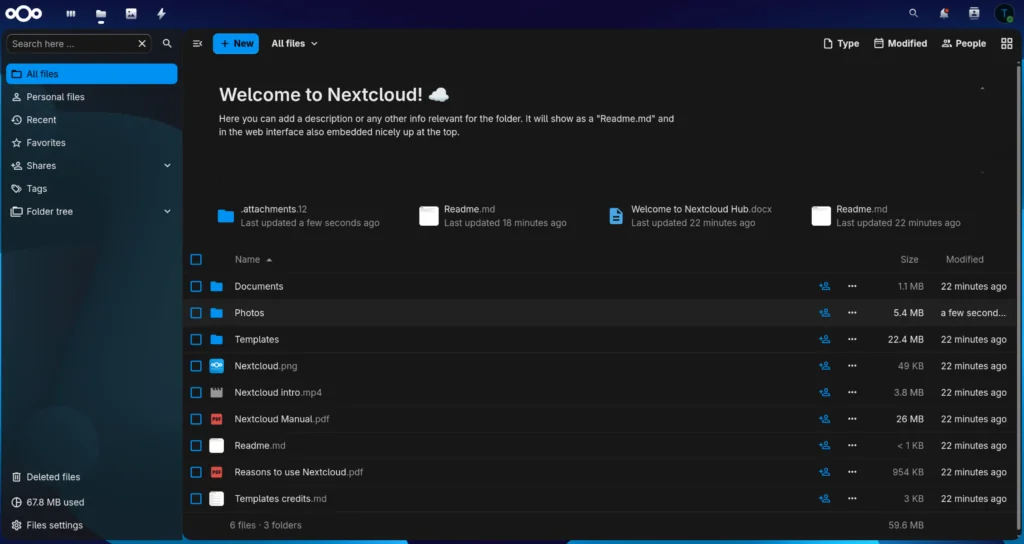
Nextcloud provides the web interface, desktop synchronization clients, mobile apps, file sharing, calendars, contacts, and the cloud-style experience most people associate with Google Drive, Dropbox, or iCloud.
This stack consists of three services:
- Nextcloud: Web UI, file sync, sharing, and applications
- MariaDB: Stores file metadata, users, shares, settings, and application data
- Redis: Provides transactional file locking and improves background job handling
Redis is strongly recommended for any real-world deployment. Without it, Nextcloud falls back to database-based file locking, which becomes inefficient once multiple devices begin synchronizing data.
Create a working directory:
mkdir -p ~/docker/nextcloud && cd ~/docker/nextcloud
Create docker-compose.yml:
services:
  db:
    image: mariadb:10.11
    container_name: nextcloud-db
    restart: unless-stopped
    command: --transaction-isolation=READ-COMMITTED --binlog-format=ROW
    volumes:
      - /mnt/nvme/nextcloud-db:/var/lib/mysql
    environment:
      - MYSQL_ROOT_PASSWORD=<root-password>
      - MYSQL_DATABASE=nextcloud
      - MYSQL_USER=nextcloud
      - MYSQL_PASSWORD=<database-password>

  redis:
    image: redis:7-alpine
    container_name: nextcloud-redis
    restart: unless-stopped
    command: redis-server --save 60 1 --loglevel warning

  app:
    image: nextcloud:stable-apache
    container_name: nextcloud
    restart: unless-stopped
    depends_on:
      - db
      - redis
    ports:
      - "8080:80"
    volumes:
      - /mnt/nvme/nextcloud:/var/www/html
      - ./nextcloud.ini:/usr/local/etc/php/conf.d/nextcloud.ini:ro
    environment:
      - NEXTCLOUD_ADMIN_USER=<admin-user>
      - NEXTCLOUD_ADMIN_PASSWORD=<admin-password>
      - NEXTCLOUD_TRUSTED_DOMAINS=<rk1-ip> localhost
      - MYSQL_HOST=db
      - MYSQL_DATABASE=nextcloud
      - MYSQL_USER=nextcloud
      - MYSQL_PASSWORD=<database-password>
      - REDIS_HOST=nextcloud-redis
      - REDIS_HOST_PORT=6379
      - PHP_MEMORY_LIMIT=1024M
      - PHP_UPLOAD_LIMIT=10G
Before deploying:
- Replace
<root-password>with a strong MariaDB root password - Replace
<database-password>with a strong password for the Nextcloud database user - Replace
<admin-user>and<admin-password>with your preferred Nextcloud administrator credentials - Replace
<rk1-ip>with the LAN IP address of your RK1 node
You can determine the node’s LAN IP with:
hostname -I
Use the first address on your local network and ignore Docker bridge addresses such as 172.x.x.x.
The NEXTCLOUD_TRUSTED_DOMAINS setting is critical. Nextcloud rejects requests from hosts that are not listed there. If your node receives a dynamic address from DHCP, consider creating a DHCP reservation or assigning a static IP.
Why NVMe Matters for Nextcloud
During initial synchronization and large file uploads, MariaDB receives a continuous stream of metadata writes while Nextcloud simultaneously reads and writes user data. Consumer eMMC storage quickly becomes the bottleneck under these workloads.
By storing both the database and application data on NVMe-backed storage, file indexing, uploads, previews, and synchronization operations remain responsive even when multiple devices are connected.
PHP Memory and Upload Limits
Create a file named nextcloud.ini in the same directory as your docker-compose.yml:
nano nextcloud.ini
Add:
memory_limit=1024M
upload_max_filesize=10G
post_max_size=10G
max_execution_time=3600
output_buffering=0
These values work well on 8GB, 16GB, and 32GB RK1 modules. The increased memory limit gives PHP workers additional headroom for thumbnail generation, large directory scans, and background processing. The upload limits allow transferring multi-gigabyte files through both the web interface and desktop sync clients without encountering upload size restrictions.
The Docker Compose file created earlier already contains the following volume mount:
- ./nextcloud.ini:/usr/local/etc/php/conf.d/nextcloud.ini:ro
First Run
Start the stack:
docker-compose up -d
Verify that all containers are running:
docker ps
Expected output (abridged):
CONTAINER ID   IMAGE                      STATUS
xxxxxxxxxxxx   nextcloud:stable-apache    Up
xxxxxxxxxxxx   mariadb:10.11              Up
xxxxxxxxxxxx   redis:7-alpine             Up
If a container exits immediately, inspect its logs:
docker logs nextcloud
docker logs nextcloud-db
docker logs nextcloud-redis
Open the web interface:
http://<rk1-ip>:8080
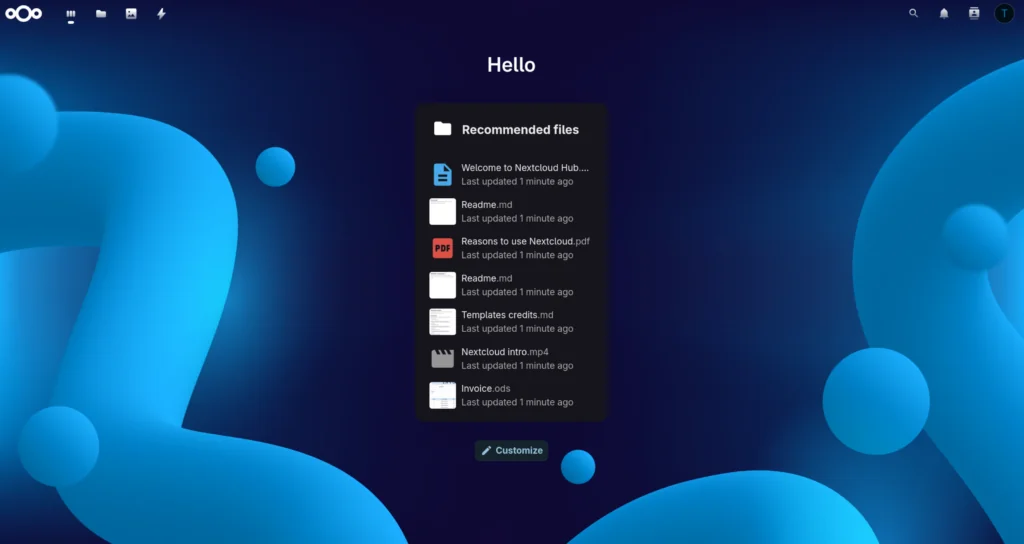
During the first startup, Nextcloud initializes the database schema, creates the administrator account, and installs default applications. Depending on storage speed and system load, this can take several minutes.
You may temporarily see a blank page or an installation message while initialization completes. This is normal.
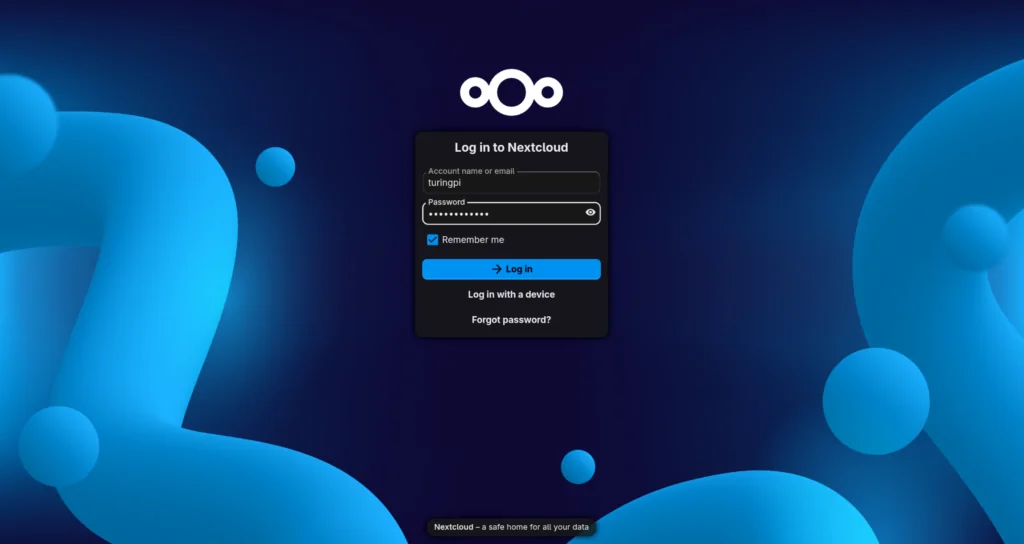
Once the login screen appears, sign in using the administrator credentials configured in the Compose file.
Part 4: Nextcloud Performance and Reliability Tuning
At this point Nextcloud should already be running and accessible. The steps below improve reliability under real-world usage by enabling scheduled background jobs and verifying Redis integration.
Background Jobs: Switch from AJAX to Cron
By default, Nextcloud executes background jobs through AJAX requests triggered by active users. This works for testing but becomes unreliable once the server is expected to process notifications, file scans, previews, cleanup jobs, and maintenance tasks automatically.
The simplest solution is a dedicated cron container.
Add the following service to your existing docker-compose.yml:
  cron:
    image: nextcloud:stable-apache
    container_name: nextcloud-cron
    restart: unless-stopped
    depends_on:
      - db
      - redis
    volumes:
      - /mnt/nvme/nextcloud:/var/www/html
      - ./nextcloud.ini:/usr/local/etc/php/conf.d/nextcloud.ini:ro
    entrypoint: /cron.sh
Apply the changes:
docker-compose up -d
Switch Nextcloud to cron mode:
docker exec -u www-data nextcloud php occ background:cron
Verify the cron container is running:
docker ps | grep nextcloud-cron
Expected output:
nextcloud-cron
Verify Redis Integration
The Compose configuration provides Redis connection details through environment variables. Modern Nextcloud releases automatically configure Redis during initial setup.
Verify that Redis was detected successfully:
docker exec -u www-data nextcloud php occ config:list system
Look for entries similar to:
memcache.distributed
memcache.locking
redis
If all three are present, Redis-backed caching and file locking are active.
You can also review the Nextcloud administration overview page:
http://<rk1-ip>:8080/settings/admin/overview
A fresh installation may show warnings related to HTTPS, email configuration, maintenance windows, or phone region settings. These are expected and do not indicate a problem with the Redis or cron configuration.
Troubleshooting
If the background job warning remains visible:
Run:
docker exec -u www-data nextcloud php occ background:cron
Then confirm the cron container is running:
docker ps | grep nextcloud-cron
If Redis warnings appear:
docker logs nextcloud-redis
docker logs nextcloud
Check both containers for connection errors before modifying the configuration.
At this point Nextcloud is running with persistent NVMe-backed storage, Redis-backed file locking, and scheduled background processing suitable for day-to-day personal cloud use.
Part 5: Syncthing for Cross-Node Replication (Optional)
If you have a second RK1 node with available storage, Syncthing can replicate your Nextcloud data to another machine without introducing Kubernetes, Longhorn, or distributed storage software.
Run a Syncthing instance on the secondary node and pair it with a Syncthing instance on the node hosting Nextcloud. Configure Syncthing to watch:
/mnt/nvme/nextcloud/data
Files uploaded to Nextcloud will then be replicated automatically to the second node.
This provides an additional copy of your data and can reduce the impact of a single-node hardware failure. However, it is important to understand the limitation:
Syncthing is replication, not backup.
If a file is deleted, corrupted, encrypted by ransomware, or overwritten on the primary node, those changes will typically propagate to the replica as well.
For actual backups, use a dedicated backup solution such as:
resticrclone- filesystem snapshots
- a second RK1 dedicated to backups
- a self-hosted NAS on your local network
Ideally, replication and backups should be used together: Syncthing provides redundancy, while backups provide recovery.
If your requirements eventually grow beyond a single-node storage architecture, the Kubernetes-focused storage solutions covered later in this series provide automatic volume replication, failover, and persistent storage management across multiple nodes.
Troubleshooting
Nextcloud Stuck in Maintenance Mode
Symptom: Login page shows “This Nextcloud instance is currently in maintenance mode” and does not allow users to sign in.
Fix:
docker exec -u www-data nextcloud php occ maintenance:mode --off
This most commonly occurs after an interrupted update, an unexpected shutdown, or a container restart during maintenance operations.
Samba Share Is Visible but Cannot Create Files
Symptom: The Samba share opens successfully, but creating, modifying, or deleting files results in a permission error.
Check the ownership of the Samba directory:
ls -ld /mnt/nvme/samba
If the directory is owned by root:root, update ownership using the UID and GID returned by:
id
Example:
sudo chown -R 1000:1001 /mnt/nvme/samba
After reconnecting to the share, file creation should work normally.
Samba Share Not Visible on the Network
Symptom: The share does not appear in Windows, macOS, or Linux file browsers, or smbclient returns “Connection refused.”
Verify the Samba container is running:
docker ps | grep samba
Expected output:
samba
Check that nmbd is running inside the container:
docker exec samba ps aux | grep nmbd
If it is not running, confirm the following exists in your Compose configuration:
- NMBD=true
Then recreate the container:
docker-compose up -d --force-recreate
Also verify the workgroup configuration:
- WORKGROUP=WORKGROUP
Most home networks use the default WORKGROUP value.
NVMe Not Mounting After Reboot
Symptom: /mnt/nvme is empty after reboot, df -h does not show the NVMe partition, or Docker containers fail because bind mounts cannot be found.
Cause: The /etc/fstab entry uses a device path instead of a UUID.
Retrieve the UUID:
sudo blkid /dev/nvme0n1p1
Your /etc/fstab entry should look similar to:
UUID=<uuid> /mnt/nvme ext4 defaults,noatime 0 2
Verify the configuration before rebooting:
sudo mount -a
Then confirm the mount exists:
df -h /mnt/nvmeVerify Container Health
If something is not behaving as expected, start by confirming all containers are running:
docker ps
Expected containers:
nextcloud
nextcloud-db
nextcloud-redis
nextcloud-cron
samba
The exact container IDs, uptime values, and port mappings will vary, but all containers should show an Up status.
Inspect logs for a specific service:
docker logs nextcloud
docker logs nextcloud-db
docker logs nextcloud-redis
docker logs nextcloud-cron
docker logs samba
Most deployment issues can be identified quickly from the container logs.
What You’ve Built
By this point, you have a fully self-hosted personal cloud running on your RK1 node:
- NVMe storage partitioned, formatted, and mounted persistently at
/mnt/nvmeusing a UUID-basedfstabentry - Dedicated storage locations for Samba, Nextcloud, and MariaDB data
- A Samba file share backed by NVMe storage and accessible from SMB-compatible clients across your local network
- A complete Nextcloud stack consisting of Nextcloud, MariaDB, Redis, and a dedicated cron container
- All application data and database files stored on NVMe rather than eMMC
- Redis-backed caching and file locking configured automatically by Nextcloud
- Scheduled background jobs running independently of user activity
- Support for large file uploads and media libraries through custom PHP configuration
- Optional Syncthing-based replication for maintaining a second copy of your data on another node
Unlike a basic file share, this setup provides web access, desktop and mobile synchronization, file sharing, user management, background processing, and persistent storage from hardware you control.
Related Articles
- Turing Pi 2.5 + RK1 Complete Setup Guide: Start here if your RK1 nodes are not yet configured. Covers Ubuntu installation, networking, Docker, and the initial cluster setup used throughout this series.
- Pi-hole + Tailscale on Turing Pi: ARM DNS Filtering and Remote Access: Access your Nextcloud instance securely from anywhere using Tailscale without exposing ports directly to the public internet.
- Self-Hosted Apps on Turing Pi 2.5: Expand your homelab with additional services such as Jellyfin, Gitea, Authentik, Immich, and other applications that pair well with Nextcloud.
- k3s on Turing Pi 2.5: Persistent Storage and Load Balancing on ARM: When a single-node Docker deployment is no longer enough, move to distributed storage, ingress, and highly available services across multiple RK1 nodes.
- Ansible on Turing Pi 2.5: RK1 Cluster Automation: Automate software installation, configuration management, and updates across multiple RK1 nodes from a single control point.
FAQ
Can Nextcloud run on ARM64 and RK3588?
Yes. The official nextcloud:stable-apache image provides ARM64 support and runs without modification on the RK1’s RK3588 SoC. MariaDB and Redis also provide ARM64 images, allowing the entire stack to run natively on ARM hardware.
The deployment described in this article has been tested on Ubuntu 22.04 ARM64 running on the RK1. File synchronization, photo uploads, and general web UI responsiveness are all excellent when the data and database are stored on NVMe rather than eMMC.
Do I Need Kubernetes to Self-Host Nextcloud on Turing Pi?
No. This guide uses Docker Compose exclusively and runs everything on a single RK1 node.
Kubernetes becomes useful when you need features such as distributed storage, automated failover, ingress management, or highly available services spread across multiple nodes. For a personal cloud running on a single RK1 with NVMe storage, Docker Compose is significantly simpler to deploy and maintain.
How Much Storage Can I Use with an NVMe on the RK1?
The RK1 supports standard M.2 NVMe SSDs, and the RK3588 platform does not impose a practical storage limit for typical homelab deployments.
The 500GB Crucial P310 used in this guide is simply an example. Larger 1TB, 2TB, and 4TB NVMe drives can be used in exactly the same way. After formatting, nearly the entire capacity is available for Samba shares, Nextcloud data, and database storage.
What Is the Difference Between Samba and Nextcloud?
Samba and Nextcloud solve different problems.
Samba exposes a directory as a network drive that can be mounted directly from Linux, Windows, macOS, and other SMB-compatible clients. It is simple, fast, and ideal for transferring files across a local network.
Nextcloud is a complete personal cloud platform with a web interface, desktop and mobile synchronization clients, file sharing, calendars, contacts, and an ecosystem of applications.
Running both together provides the best of both worlds: fast LAN file access through Samba and cloud-style synchronization and sharing through Nextcloud.
How Do I Access Nextcloud Remotely Without Opening Ports?
Tailscale is one of the easiest ways to securely access a self-hosted Nextcloud instance from anywhere.
Install Tailscale on the RK1 node and on your phone, laptop, or desktop. Once connected, your devices can reach Nextcloud over a private encrypted network without configuring port forwarding on your router.
If you access Nextcloud using a Tailscale IP address or MagicDNS hostname, add that address to Nextcloud’s trusted_domains configuration.
For a complete walkthrough, see Pi-hole + Tailscale on Turing Pi: ARM DNS Filtering and Remote Access.
Is Nextcloud Performance Good Enough on ARM64 for Daily Use?
Yes, provided the database and application data are stored on NVMe storage.
Nextcloud generates a constant stream of metadata operations through MariaDB, especially during synchronization, file indexing, and photo uploads. These workloads can overwhelm eMMC storage, leading to slow performance and delayed synchronization.
When backed by NVMe storage, the RK3588 has more than enough CPU performance and memory for personal and family use. Redis caching, dedicated cron jobs, and appropriate PHP limits further improve responsiveness and overall user experience.