This is the complete Turing Pi 2.5 setup guide – from physical assembly to a real, working k3s cluster with a deployed application. You’ll flash Ubuntu to your RK1 modules using the onboard BMC, configure static networking, install k3s on a two-node ARM cluster, and deploy Uptime Kuma as your first production-style workload. No hand-waving. No prior cluster or Kubernetes experience required. Every command is here.
In this first guide we start with a simple 2-node cluster (1 server + 1 worker). This makes it much easier to learn the fundamentals. Future articles will expand to 3 and 4 nodes.
Quick Overview: Turing Pi 2.5 + RK1 Setup at a Glance
- Physical setup: insert RK1 modules into the Turing Pi 2.5 board, mount in a case (optional), and connect to your router via Ethernet
- Flash Ubuntu 22.04: access the BMC web UI, update BMC firmware if prompted, then flash the Ubuntu 22.04 ARM64 image to both RK1 nodes directly from the browser
- First boot: power on nodes via BMC, SSH in with default credentials, run system updates, and set hostnames
- Static networking: configure static IPs on both nodes using Netplan so your k3s cluster stays stable across reboots
- Install k3s: install k3s on Node 1 as the control plane, copy the node token, then join Node 2 as a worker agent
- Verify the cluster: confirm both nodes show
Readystatus usingkubectl get nodes - Deploy your first app: apply the Uptime Kuma manifest and access your self-hosted monitoring dashboard at
http://<node-ip>:30001
What You’re Building: Turing Pi 2.5 + RK1 Setup Overview
The Turing Pi 2.5 is a Mini-ITX board that accepts up to four compute modules in SO-DIMM-style slots, essentially a motherboard designed to host multiple ARM computers simultaneously, all sharing a built-in network switch and a single PSU. The RK1 modules are ARM SBCs based on the Rockchip RK3588 chip; each one is a small server-class computer that slots directly into the board.
Here’s our setup for this guide:
| Slot | Module | RAM | Storage | Role |
| Node 1 | RK1 | 8 GB | 32 GB eMMC | Control-plane (server) |
| Node 2 | RK1 | 16 GB | 32 GB eMMC | Worker (agent) |
Part 1: Unboxing and Physical Assembly of Your Turing Pi 2.5
What’s in the Box
Your order typically includes:
- The Turing Pi 2.5 Mini-ITX board
- RK1 compute modules
- Any additional accessories (heatsinks, power supply, ITX case etc.)
All components are usually packed separately. RK1 modules come in anti-static packaging.
Inserting the RK1 Modules
⚠️ Warning: Handle the RK1 modules like RAM sticks. Touch a metal surface before handling to discharge static electricity. Never force a module in.
💡 Tip: If you have heatsinks, install them on the RK1 modules before inserting them into the board.
- Locate Node 1 and Node 2 slots on the board (labeled on the PCB silkscreen).
- Hold the RK1 at roughly a 30-degree angle, align the edge connector with the slot.
- Press it gently but firmly into the slot until it clicks, then push the module flat until the retention clips snap into place on both sides.
- Repeat for Node 2 in the adjacent slot.

Mounting in a Case (Optional but Recommended)
The Turing Pi 2.5 uses the standard Mini-ITX form factor (170mm × 170mm), so it fits in any Mini-ITX case. Mounting keeps airflow consistent and protects the board. Attach it to your case standoffs using the included screws, then connect the PSU’s 24-pin ATX connector.
If you want a case designed specifically for this setup, you can get it from the shop.
💡 Tip: If you don’t have a case yet, you can run everything on an open bench for now. Just don’t slide it across a surface.
Part 2: Flashing Ubuntu 22.04 ARM64 via the Turing Pi 2.5 BMC
Both nodes need an OS. On a typical ARM SBC (like a Raspberry Pi), this usually means flashing an SD card manually and repeating the process for every node.
The Turing Pi 2.5 skips all of that with its built-in BMC (Baseboard Management Controller) – a dedicated management chip that lets you flash OS images directly over the network without touching any module. It’s one of the board’s biggest practical advantages.
Accessing the BMC
- Connect the Turing Pi 2.5 to your router using an Ethernet cable.
- Power on the board using your ATX power supply.
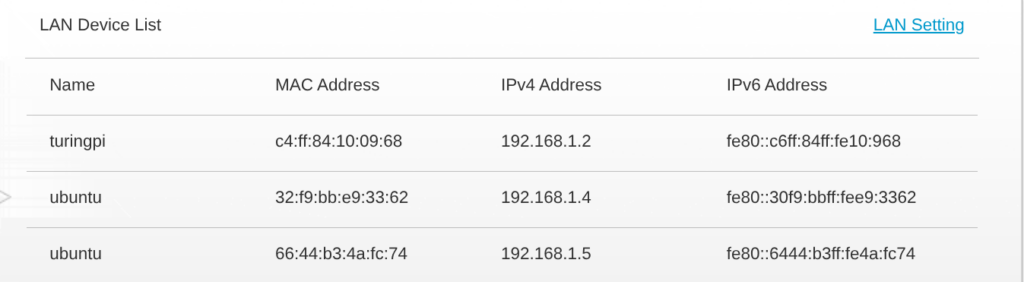
- Find the BMC’s IP address in your router’s DHCP client list. It will show up as something like
turingpi.

- Open that IP address in your browser (e.g.,
http://192.168.1.2).
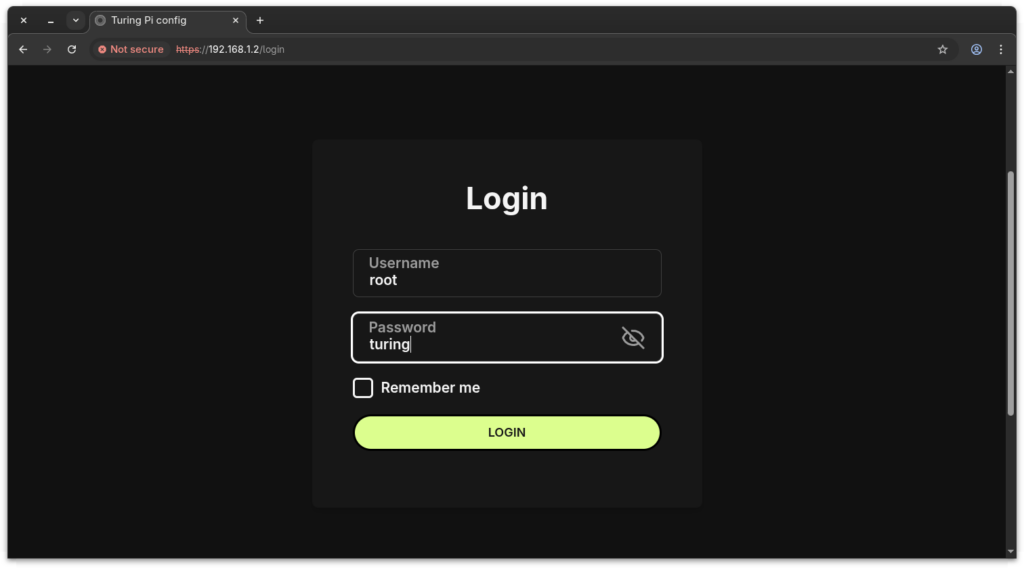
- Log in with the default credentials (typically
root/turing).
Updating the BMC Firmware (If Prompted)
After logging in, the BMC may notify you that a firmware update is available. Update it before flashing any nodes. Running the latest BMC firmware ensures the most stable flashing experience.
To update:
- In the BMC UI, click the Firmware Upgrade tab in the top navigation.
- Download the latest BMC firmware
.tpufile from:https://firmware.turingpi.com/turing-pi2/ - Click the upload icon in the .tpu file (remote or local) field and select the file you downloaded.
- Click Upgrade and wait for the upload and flashing process to complete.
- Once finished, a prompt will appear saying “Upgrade Finished!” – click Reboot to restart the BMC.
- Wait 1-2 minutes, then log back in and confirm the updated daemon version is shown in the top left next to the hostname.
💡 Tip: Full BMC firmware upgrade instructions are at
docs.turingpi.com/docs/turing-pi2-bmc-firmware-upgradeif you run into anything unexpected.
⚠️ Warning: Do not power off the board during the firmware update or before the reboot completes.
Once the BMC is on the latest firmware, continue to the next step.
Downloading the Ubuntu Server ARM64 Image for RK1
You need the Ubuntu Server ARM64 image built specifically for the RK1. Get it from the official Turing Pi image repository:
https://firmware.turingpi.com/turing-rk1/The directory lists all available releases by version number. Download the server .img.xz file from the latest folder in the Ubuntu directory. We link to the image directory rather than a specific version so this guide stays accurate as new releases are added.
You do not need to decompress it, the BMC flashes directly from the compressed image.
It’s also recommended to download the corresponding .sha256 file to verify the integrity of the image after download.
Flashing Node 1 (and Node 2)
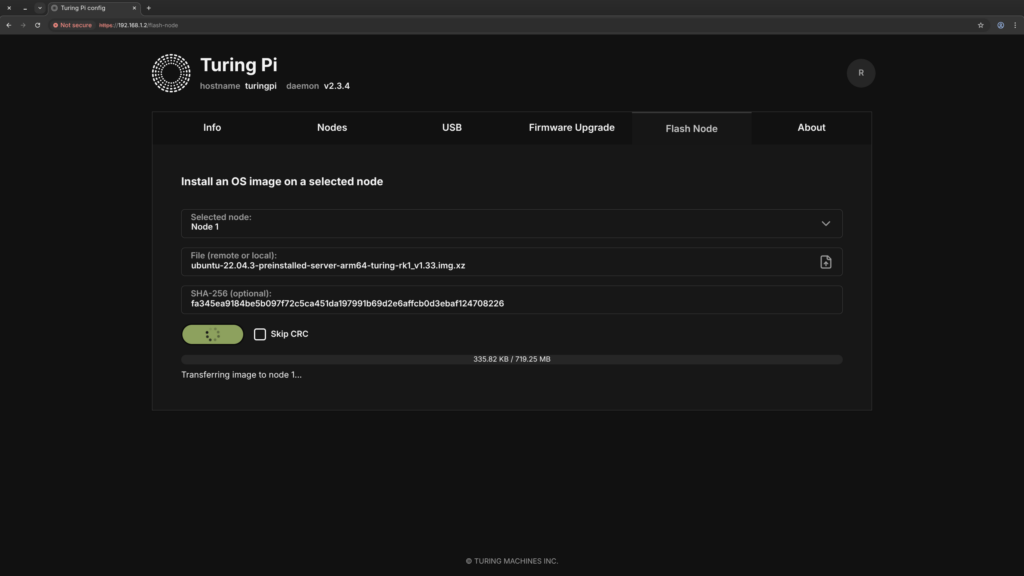
- In the BMC UI, go to the Flash Node section.
- Select Node 1.
- Upload the server
.img.xzfile you downloaded. - Enter the SHA256 checksum from the
.sha256file. Copy only the hash value (the long string before the filename) and paste it into the BMC.
📝 Note: Leave the Skip CRC option unchecked. This ensures the BMC verifies the image while flashing, which is slower but safer.
- Click Install OS and wait for it to complete (typically 3-5 minutes).
- Repeat the exact same process for Node 2.
⚠️ Warning: Do not power cycle the board during flashing. A failed flash can leave a node in an unbootable state, requiring a reflash.
Part 3: First Boot and Basic Node Configuration
Powering On the Nodes
In the BMC UI, go to the Nodes section, click Edit, and power on Node 1 and Node 2 individually using the power buttons. You’ll see a red indicator light next to each node once it’s powered on.
Default SSH credentials for the Ubuntu RK1 image are ubuntu / ubuntu. You’ll be forced to change the password on first login.
SSH into Each Node
From your laptop or desktop on the same network:
# Connect to Node 1
ssh ubuntu@<node-1-ip>

# Connect to Node 2 (open a second terminal tab)
ssh ubuntu@<node-2-ip>
💡 Tip: Check your router’s DHCP client list to find the exact IP addresses assigned to each node. You’ll assign static IPs in the next part.
📝 Note: Note these IPs down now. You’ll only need them temporarily since Part 4 replaces them with static addresses.
Replace <node-1-ip> and <node-2-ip> with the actual IP addresses you see in your DHCP client list, for example ssh [email protected]
Initial Setup Commands for Both Nodes
After SSHing in, run the following on each node:
# Update the system
sudo apt update && sudo apt upgrade -y
# Set the hostname - on Node 1:
sudo hostnamectl set-hostname k3s-server

# On Node 2:
sudo hostnamectl set-hostname k3s-agent-1
Part 4: Setting Up Static Networking with Netplan
Why Static IPs Matter in a k3s Cluster
Static IPs are non-negotiable for a cluster. If a node reboots and gets a new DHCP address, other nodes can’t find it and k3s will break. Assigning fixed IPs upfront saves you from debugging later.
Ubuntu 22.04 uses Netplan for network configuration.
Assigning Static IP Addresses
On Node 1 (k3s-server), SSH into the node and edit the Netplan config file:
sudo nano /etc/netplan/50-cloud-init.yaml
Replace the contents with:
network:
  version: 2
  ethernets:
    eth0:
      dhcp4: no
      addresses:
        - <your-node-ip>/24
      routes:
        - to: default
          via: <your-router-ip>
      nameservers:
        addresses: [1.1.1.1, 8.8.8.8]
- Replace
<your-node-ip>with a static IP for this node (e.g., 192.168.1.3) - Replace
<your-router-ip>with your router’s IP (commonly 192.168.1.1)
Apply it:
sudo netplan apply
On Node 2, repeat the same process, but assign a different static IP address (e.g., 192.168.1.4).
Add Hostnames to /etc/hosts
On both nodes, add entries so they can resolve each other by name:
sudo nano /etc/hosts
Add these two lines at the bottom:
<node-1-ip> k3s-server
<node-2-ip> k3s-agent-1
Replace <node-1-ip> and <node-2-ip> with the static IP addresses assigned to each node.
Part 5: Installing k3s on Your Turing Pi 2.5 ARM Cluster
Why k3s Instead of Full Kubernetes?
k3s is a lightweight, fully certified Kubernetes distribution, all the core functionality at a fraction of the footprint. Standard Kubernetes requires multiple components running separately (etcd, kube-apiserver, kube-scheduler, etc.) and routinely consumes 1-2 GB of RAM just for the control plane. k3s bundles everything into a single ~70 MB binary that runs comfortably on an 8 GB RK1. For ARM homelab hardware, it’s the obvious choice.
In a k3s cluster there are two roles:
- Server (control-plane): The brain. Manages cluster state and schedules where workloads run.
- Agent (worker node): The muscle. Actually runs your applications.
Step 1: Install k3s on Node 1 (Control-Plane)
SSH into Node 1 and run:
curl -sfL https://get.k3s.io | sh -
Within about 60 seconds, k3s is installed and running. Verify it:
sudo k3s kubectl get nodes
You should see k3s-server listed with status Ready.
Now grab the node token, you’ll need it to join the worker:
sudo cat /var/lib/rancher/k3s/server/node-token
Copy that long string. It’s the shared secret your worker uses to authenticate with the control plane.
Step 2: Join Node 2 as a k3s Agent
SSH into Node 2 and run the agent install command. Replace YOUR_TOKEN with the token you just copied and <node-1-ip> with the static IP address you assigned to Node 1 in Part 4.
curl -sfL https://get.k3s.io | K3S_URL=https://<node-1-ip>:6443 K3S_TOKEN=YOUR_TOKEN sh -
Step 3: Verify Both Nodes Are Ready
Back on Node 1, run:
sudo k3s kubectl get nodes -o wide
After about 30 seconds you should see:
NAME           STATUS   ROLES                  AGE   VERSION
k3s-server     Ready    control-plane,master   5m    v1.29.x+k3s1
k3s-agent-1    Ready    <none>                 1m    v1.29.x+k3s1
Both nodes show Ready. Your cluster is alive.

Part 6: Deploying Your First App: Uptime Kuma
“Hello World” is boring. Let’s deploy Uptime Kuma, a self-hosted monitoring dashboard that watches your services and alerts you when something goes down. It’s practical, has a great UI, and is a perfect first real workload.
Create the Deployment Manifest
On Node 1, create a file called uptime-kuma.yaml:
nano ~/uptime-kuma.yaml
Paste in the following:
apiVersion: apps/v1
kind: Deployment
metadata:
  name: uptime-kuma
  namespace: default
spec:
  replicas: 1
  selector:
    matchLabels:
      app: uptime-kuma
  template:
    metadata:
      labels:
        app: uptime-kuma
    spec:
      containers:
        - name: uptime-kuma
          image: louislam/uptime-kuma:1
          ports:
            - containerPort: 3001
          volumeMounts:
            - name: data
              mountPath: /app/data
      volumes:
        - name: data
          emptyDir: {}
---
apiVersion: v1
kind: Service
metadata:
  name: uptime-kuma
  namespace: default
spec:
  type: NodePort
  selector:
    app: uptime-kuma
  ports:
    - port: 3001
      targetPort: 3001
      nodePort: 30001
📝 Note: This manifest uses
emptyDirfor storage, which means Uptime Kuma’s data (your monitors and settings) will reset if the pod restarts or gets rescheduled to another node. This is intentional for now. Persistent storage is covered in the upcoming article. Don’t spend time configuring a lot of monitors just yet.
Apply it:
sudo k3s kubectl apply -f ~/uptime-kuma.yaml
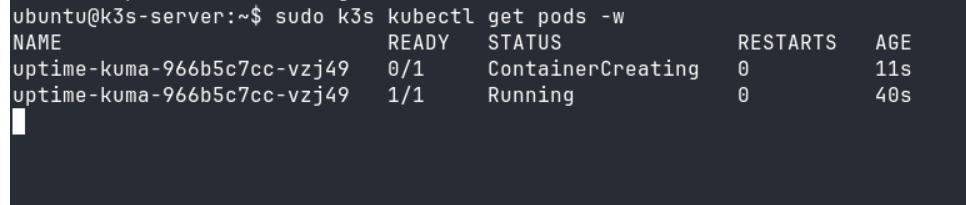
Watch the Pod Deploy
sudo k3s kubectl get pods -w
You’ll see the pod go from ContainerCreating → Running in about 30-60 seconds while k3s pulls the image and schedules it onto one of your nodes.
Access Uptime Kuma
Open your browser and navigate to:
http://<node-ip>:30001
Replace <node-ip> with the IP address of any node in your cluster.
Any node will work, k3s routes the traffic internally (kube-proxy), so it doesn’t matter which node the pod is running on.
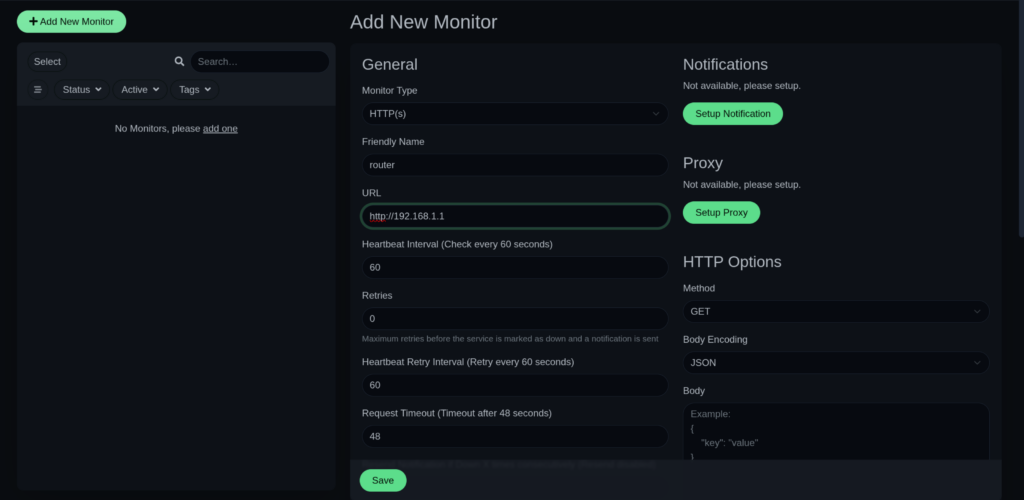
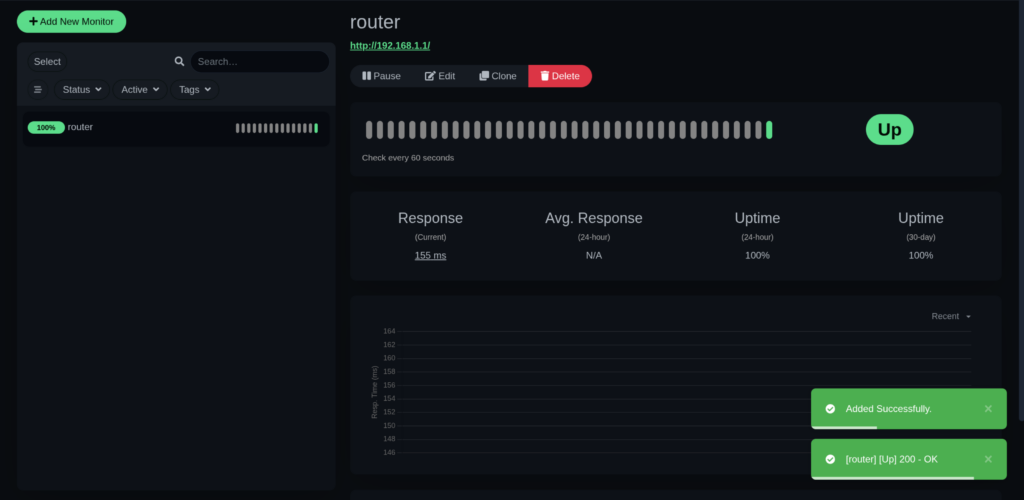
You’ll be greeted by the Uptime Kuma setup wizard. Create your admin account and add your first monitor. Try pointing it at your router (http://192.168.1.1) to confirm everything works end-to-end.
Part 7: Verifying Your Cluster is Healthy
Run these commands on Node 1 to confirm everything is working:
# Check nodes
sudo k3s kubectl get nodes

# Check all running pods across the cluster
sudo k3s kubectl get pods -A

# Check your Uptime Kuma service
sudo k3s kubectl get svc uptime-kuma
You should see the system pods in kube-system (k3s’s internal services) alongside your uptime-kuma pod in default , all with Running status.
💡 Tip: Bookmark
kubectl get pods -A– it’s the single most useful command for understanding what’s happening in your cluster at any moment.
Part 8: Troubleshooting Common Issues
Node 2 Won’t Join the Cluster
Check first: Is the token correct? Even a single missing character breaks authentication. Re-copy the token with sudo cat /var/lib/rancher/k3s/server/node-token and retry.
Check second: Can Node 2 reach Node 1 on port 6443? From Node 2, run:
curl -k https://<node-1-ip>:6443
If this returns a 401 Unauthorized response, it means the node can reach the k3s server successfully.
If it fails:
- connection refused → the server isn’t running or not listening on port 6443
- timeout → network connectivity issue (nodes not on same subnet, wrong IP, etc.)
- DNS error → incorrect IP or hostname
Confirm that netplan apply was run on Node 1 and that both nodes are on the same subnet.
Pod Stuck in Pending
A pod stays in Pending when Kubernetes can’t find a suitable node to run it on. This usually happens if a node hasn’t fully joined yet or is in a NotReady state.
First, list all pods:
sudo k3s kubectl get pods -A
Find the pod name and its namespace, then describe it:
sudo k3s kubectl describe pod <pod-name> -n <namespace>
Look at the Events section at the bottom. It will tell you exactly why the pod isn’t scheduling.
Pod Stuck in ContainerCreating
This usually means the node is still pulling the container image. On a first deployment over a home network, this can take 2-3 minutes. Watch progress in real time:
sudo k3s kubectl get pods -w
If it’s stuck beyond 5 minutes, check the pod details for errors.
sudo k3s kubectl describe pod <pod-name> -n <namespace>
Can’t Access Uptime Kuma in the Browser
First, confirm the NodePort service is running and mapped correctly:
sudo k3s kubectl get svc uptime-kuma
You should see 3001:30001/TCP in the PORT(S) column. If the service isn’t listed at all, the manifest didn’t apply cleanly, re-run sudo k3s kubectl apply -f ~/uptime-kuma.yaml and check for any errors in the output.
If the service is listed but the browser still can’t connect:
- Check the pod is actually running:
sudo k3s kubectl get pods. If the status is anything other thanRunning, describe it withsudo k3s kubectl describe pod <pod-name>and check the Events section. - Try a different node IP: NodePort services are accessible on any node in the cluster. If
http://<node-1-ip>:30001doesn’t load, tryhttp://<node-2-ip>:30001. - Wait a moment: If the pod just transitioned to
Running, give it 10-15 seconds to finish its internal startup before the web UI becomes available.
What You’ve Just Built
At this point, your Turing Pi 2.5 + RK1 setup is fully operational. Here’s what’s running:
- A real k3s Kubernetes cluster on ARM hardware – not a simulation, not a VM
- A control-plane node managing cluster state and scheduling
- A worker node running your first real workload
- A self-hosted monitoring dashboard accessible on your local network
This is the same fundamental architecture used in production cloud environments, running on your desk, on ARM, at a fraction of the power draw. That’s what makes the Turing Pi 2.5 homelab setup genuinely different from a single SBC or a rented cloud instance.
What’s Next: Building on Your Turing Pi 2.5 Cluster
This is just the starting point. As this series continues, you’ll build on this exact setup to explore what the Turing Pi 2.5 + RK1 cluster is really capable of:
- Expanding to 3 and 4 nodes: see how k3s distributes workloads as your cluster grows
- Persistent storage: replace
emptyDirwith proper storage using Longhorn or NFS so your data survives pod restarts - Local AI inference: deploy Ollama on your RK1 cluster and run LLMs entirely on your own hardware
- Self-hosted services: Gitea, Vaultwarden, Jellyfin and more, all managed with k3s
- Cluster observability: monitor CPU, memory, and node health with Prometheus and Grafana
- CI/CD on ARM: automate deployments from a self-hosted Gitea instance
Follow along as the series grows. Each article builds directly on the cluster you just set up.
FAQ: Turing Pi 2.5 Setup Common Questions
Do I need all 4 RK1 slots filled to run the Turing Pi 2.5?
No. The board works with as few as one compute module. You can start with 1 or 2 RK1s and add more later. The slots are fully independent.
Can I run a different OS on the RK1 compute module instead of Ubuntu 22.04?
The official image repository at firmware.turingpi.com/turing-rk1 currently provides Ubuntu builds for the RK1. Community-built images for other distros exist and are shared on the Turing Pi forum and Discord, but are not officially supported. This guide is tested specifically on Ubuntu 22.04 Server ARM64, so if you use something else, the Netplan steps and package commands may differ.
How do I check RAM and storage usage on a Turing Pi RK1 node?
SSH into the node and run:
df -h && free -h
df -h shows your 32 GB eMMC disk usage. free -h shows RAM, focus on the available column for a realistic picture of what your RK1 has left for new workloads. Run this on each node separately, since your control-plane (Node 1) and worker (Node 2) will show different memory profiles.
Turing Pi 2.5 vs Raspberry Pi cluster: what’s the actual difference?
The core difference is integration. With a Pi cluster, each board needs its own SD card flashed individually, its own network cable to an external switch, and its own power connection. There’s also no BMC, so managing or recovering a node always means physical access. The Turing Pi 2.5 consolidates all of that into one board with a built-in switch, single ATX power input, and BMC-based remote management. It’s also considerably more compact.
How much power does a 2-node RK1 cluster draw?
At typical load, a 2-node RK1 cluster draws roughly 10-18W total. At full load with all cores active on both nodes, expect 25-35W. For reference, a single desktop GPU at idle often consumes more than this entire cluster under load.
Can I run Docker on the RK1 without setting up a k3s cluster?
Yes. The RK1 runs standard Ubuntu, so plain Docker works fine. Just install it via apt. k3s is a great choice when you want multi-node orchestration or plan to follow this series, but it is entirely optional.
What’s the default BMC login for the Turing Pi 2.5?
The default credentials are typically root / turing. If this doesn’t work, check the official documentation at docs.turingpi.com.